Easy Steps for Sweet Onion Success

If you’re like me and you love a sweet onion that’s big as in totally covers your hamburger bun and heavy as in juicy crisp, then let’s talk. I grew that onion! How did I get to this place of sweet onion success?
Researched-based knowledge from WSU and my Master Gardener program illuminated the easy steps for sweet onion success. At its most basic level, here are the requirements: soil, water, sun, weed maintenance, and pest management, but let me show you how I did it.

Soil Fertility
In March, I observed that the soil level in my raised beds had dropped, as in my soil had shrunk? Yes, because my soil had compacted and lost micronutrients during the last growing season. I added three to four inches of decomposed compost and thoroughly mixed it with the existing soil raising the soil fertility from death valley to ideal loam.
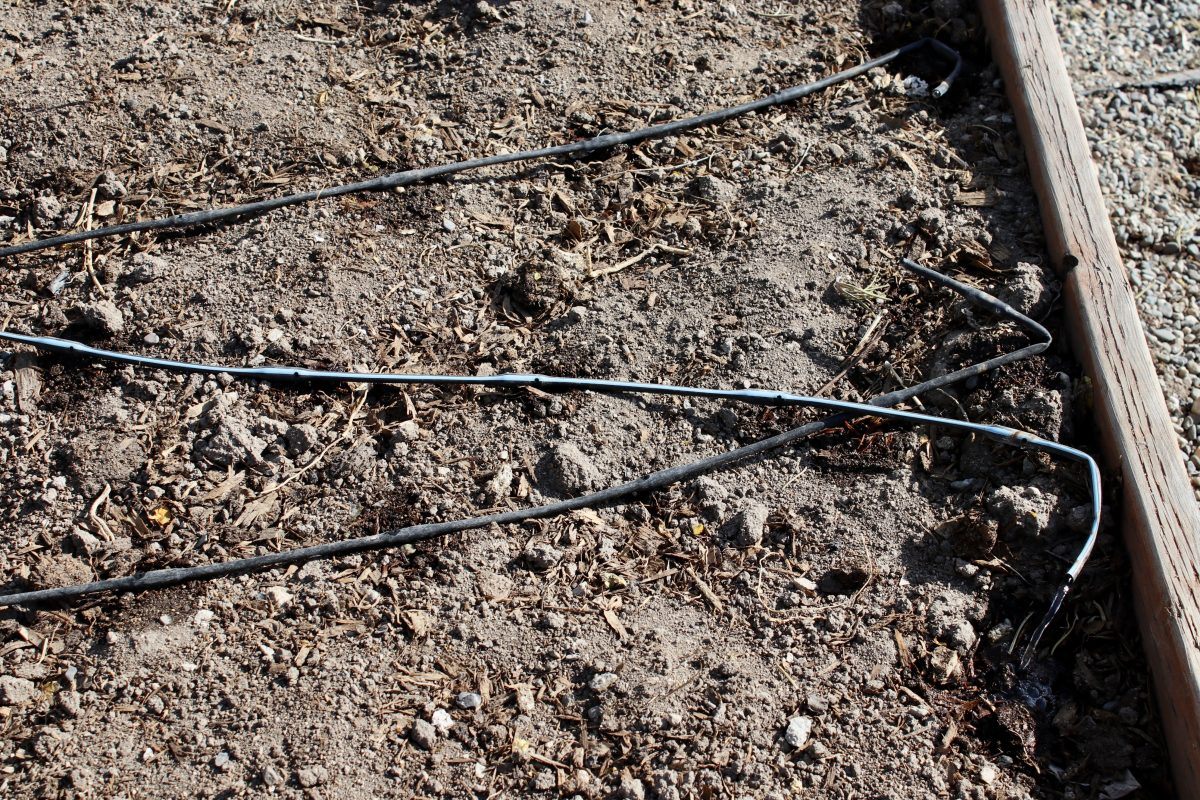
Irrigation Preparation
I ran water through my drip irrigation lines and replaced lines that weren’t dripping well. It’s time to replace the driplines when calcium deposits formed last season block the drip holes. Shallow roots of onions need regular evenly applied water, so get your irrigation system prepared in advance!
Sweet Onion Set from Reputable Nursery
I purchased a sweet onion set (grown from seed the year before) from a reputable nursery. My sweets are Candy Onions from Bonnie Plants. Before planting, I used the edge of my hoe to create a row and soaked the soil with water for a softer, moist medium to place new plants with delicate roots.
After laying out each onion in the row, I poked a one-inch hole for placing the roots. Once in the hole, I pressed all around the base of the green onion top for firm placement.
Riveting right! I cannot stress enough how shallow-rooted this plant is and how important water is to its success! One might ask, “Heeeyyy Agrarian Angel, that’s the second time you’re watering the onions. Why?” Because a second light sprinkling ensures even soil moisture from the beginning.

Mulch
Another way to promote soil moisture is to add an organic mulch. By covering the exposed soil with mulch, you’ll also have the benefit of blocking weeds from sunlight. Onions don’t compete with weeds well. My mulch is the grass clippings from our lawn. I have a collection bin at the garden where we deposit our grass clippings, so I have an endless supply to cover the garden and add nitrogen to my compost pile.
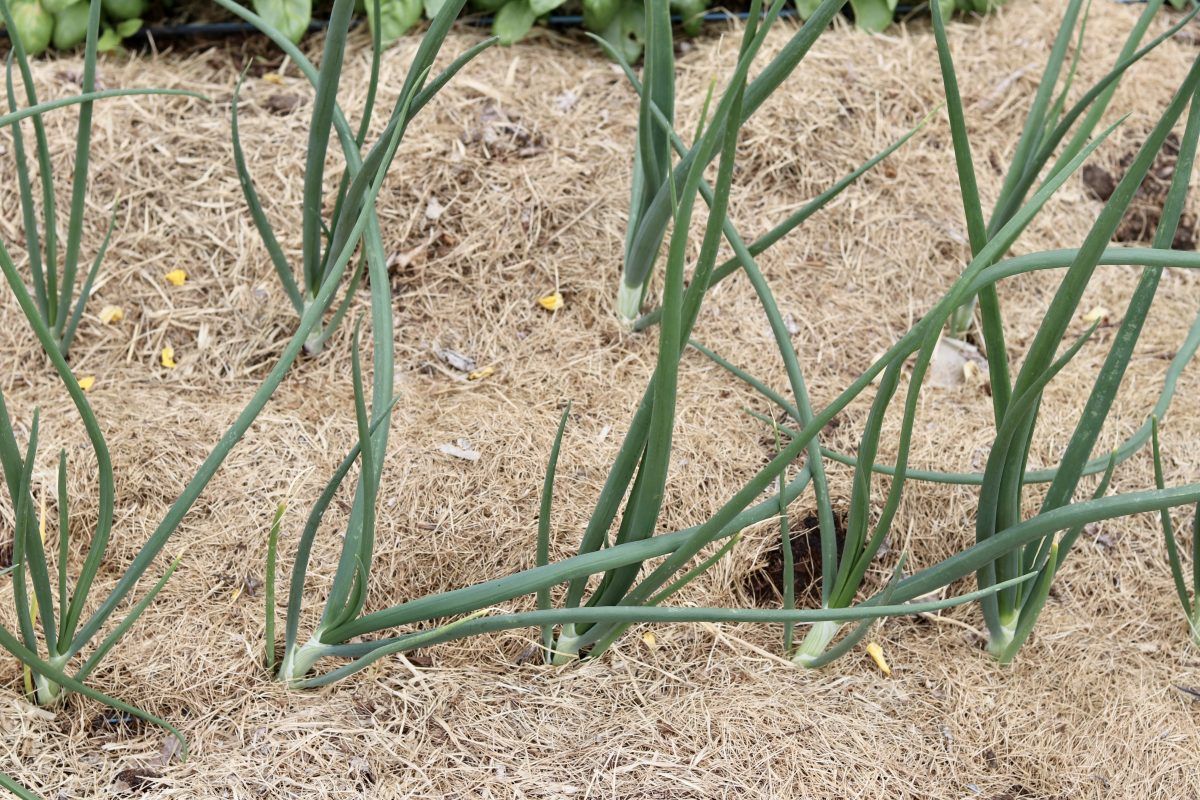
I keep adding the mulch until all of the soil is covered, and the weeds have no hope for sunlight.

The mulch gives the bed such a tidy golden weed-free backdrop for the bright green vegetables growing happily.
The generous space of four to six inches between plants allows the bulbs room to grow. As the bulbs expand, remove mulch that might be keeping the bulbs excessively moist. Once they reach the size you like, harvest, and eat! Sweet onions don’t store well, so keep them in the fridge after collecting them.
Vigilance for Insects & Disease
Onion thrips and onion maggots are the most common insect problems. White rot is the most common disease. If you encounter insects or disease, contact your local Master Gardener program or reach out to your state university’s county extension office.

Timely Harvest
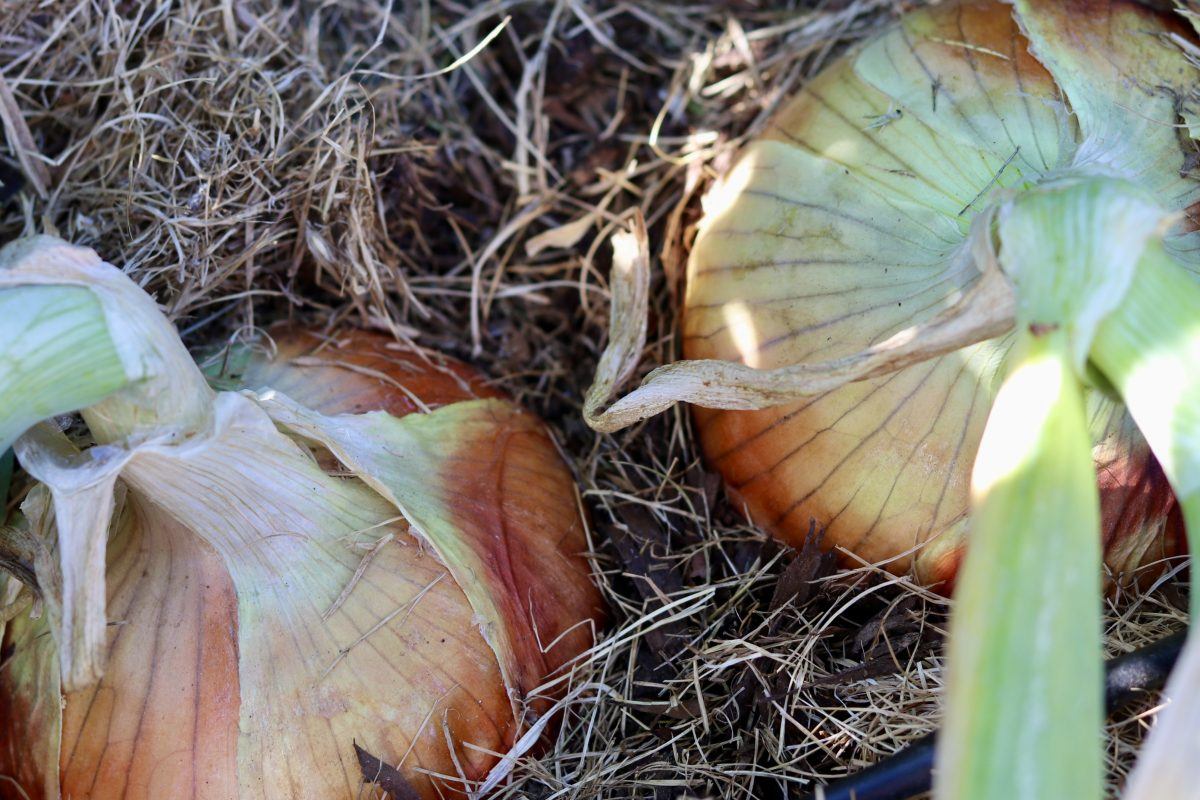
Notice that the tops have fallen over since we planted 100 days ago, or a little over three months ago? We, onion lovers, know that’s the sign the onions aren’t going to get any bigger and are ready to harvest. Pull them up, brush off the soil, and lay or hang them out to cure with their tops attached. A shaded, warm, airy location that allows bulbs to stay dry and get good air circulation is ideal.

Cure & Store
In such an ideal location, the curing should only take a few days to allow the roots to wither and the necks to slowly dry above the bulb. The curing process seals the top of the bulb, lowering the risk of rot. When the outer skin is dry and crispy, its time to cut off the tops and roots. Keep the papery skin intact and put the onions in a cool location such as the refrigerator.

So there it is easy steps for sweet onion success. I know what you’re thinking! How did I succeed using Bill’s ladder and parking space? Frying onions, Baby! The whiff of frying onions eclipses the protest he brings through the door. The next words out of his mouth are, “What’s for dinner?”